Design a Simple Calculator Application Using Android Studio....(Part 2-Calculator Implementation )
Build a Simple Calculator Performing Arithematic Operations Using Android Studio.....
In The Previous Tutorial We Have Designed The layout Of Calculator...In This Tutorial We Will Be Working On The Implementation Part ie. With The MainActivity.java file
If You are New to the tutorial go through Following Link For Calculator Design Layout
Calculator Layout Design
Lets start...
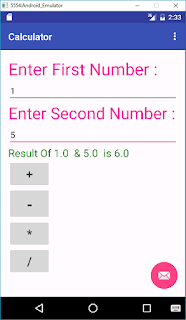
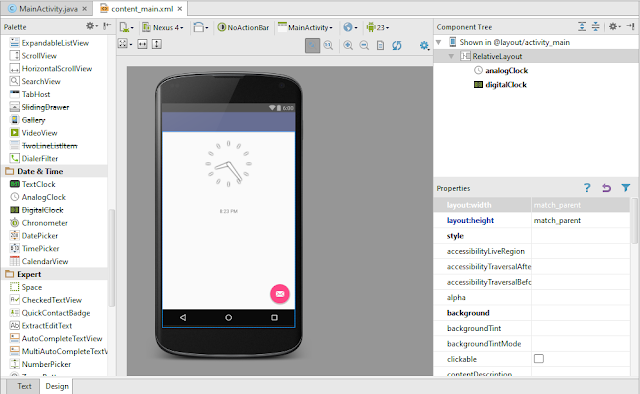
1.The Layout Of Our Project Looks Something Like This...

Make Sure The Layout Has Four Buttons and Each Button with "onClick" property has been given some value or name.
(Recommended to Provide a Single Name For All Buttons to Avoid Confusion Ahead)...
2.Now Open the "MainActivity.java" file...Which Shall Be Something like this..

3.Create a Method...which should be something like this...
public void <OnClickname>()
{
//Implement Your Logic here...
}
As Shown.....I have Provided the Logic Below...
Content_main.xml is attached In Previous Video You Can Through Above mentioned Link...
MainActivity.java File
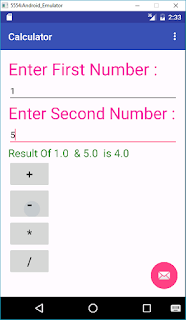
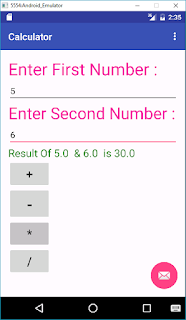
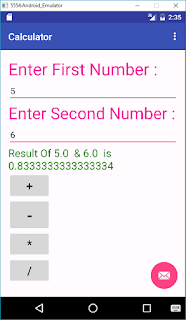
4.Hence,Run Your App On Emulator....
Its Working...!!
If You are New or Don't Know How To Run App On Emulator Go to My Following Link...
Run App On Emulator..
Thank You...!!!
In The Previous Tutorial We Have Designed The layout Of Calculator...In This Tutorial We Will Be Working On The Implementation Part ie. With The MainActivity.java file
If You are New to the tutorial go through Following Link For Calculator Design Layout
Calculator Layout Design
Lets start...
1.The Layout Of Our Project Looks Something Like This...

Make Sure The Layout Has Four Buttons and Each Button with "onClick" property has been given some value or name.
(Recommended to Provide a Single Name For All Buttons to Avoid Confusion Ahead)...
2.Now Open the "MainActivity.java" file...Which Shall Be Something like this..

3.Create a Method...which should be something like this...
public void <OnClickname>()
{
//Implement Your Logic here...
}
As Shown.....I have Provided the Logic Below...
Content_main.xml is attached In Previous Video You Can Through Above mentioned Link...
MainActivity.java File
4.Hence,Run Your App On Emulator....
Its Working...!!
If You are New or Don't Know How To Run App On Emulator Go to My Following Link...
Run App On Emulator..


Thank You...!!!
Comments
Post a Comment