Create Simple "Hello World" Android Application Using Android Studio
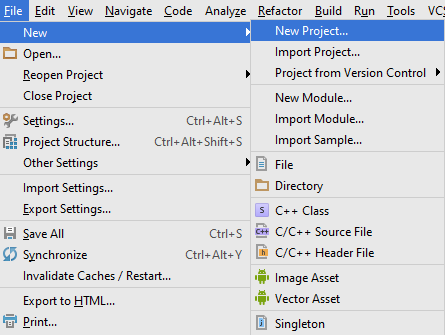
1.Start Android Studio
This is the starting window Of Android Studio.
Select "Start a new Android Studio project"

Fig-1.Startup Android Studio Window
Provide Appropriate Project Name with disk drive location and click "Next".

Fig-2.Create New Project
Select your preferred android version SDK (Recommended to choose Minimum SDK)

4.Adding Activity For Application...Select Blank Activity and click "Next"

5.Provide Activity Name with the layout name & Title and Say "Finish"...(Recommended To Keep Default Names To Avoid Naming Confusion Ahead..)

Fig-5.Customize Blank Activity
6.Your Android Studio would be creating Project and loading component...

Fig-6.Creating Project
7.Building Project Info

8.The Below Pop-up window shall Prompt...(Recommended to go through instructions and say "Close")

Fig-8.Processing Project

Fig-9.Main Activity
10. Default XMl code for the App Design...(Text option Given Below the Code shows the xml code and Design Option shows the App design)

Fig-10.XML Code For App Design
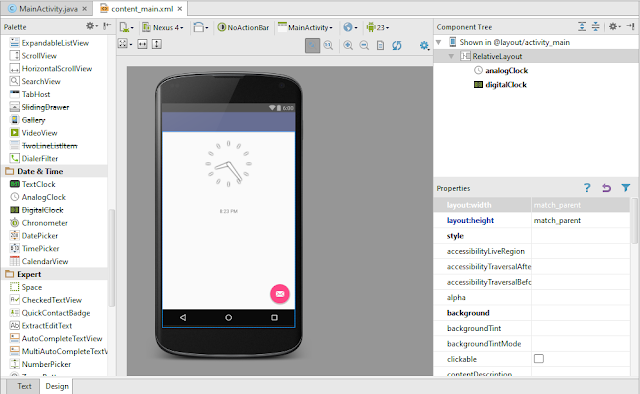
11. Introduction To Android Studio Editor
1.Palette: Provides a list of widgets and layouts which you can drag and drop into your layout in the editor.
2.Component Tree: Shows the view hierarchy for your layout. Click an item here to see it is selected in the editor.
3.Properties: Provides property controls for the currently selected view.
4.Screen Orientation: Rotate the device between landscape and portrait.
5.API Version: Select the version of Android on which to preview your layout.

Fig-11.Introduction To Editor
By Selecting The Text You Can Modify The Text As Per Your Requirement (As Shown Below I have Updated the Text Size and Text Color).

Fig-12.Modifying TextView
a.Select "Plain Text View" From Widgets and drag into your layout in Editor

Fig-13.a.Drag Plain Text-view
b.Select the Text view on the layout and access the properties(As Shown Below I have Updated the Text Size and Text Color).

Fig-13.b.Update Plain Textview By Accessing Properties
14. Your Final Layout Should Look Something like this.......

Fig-14.Final Layout
15.You Have Successfully Created Your "Hello World" Layout...
In The Next Tutorial We Will Be Running the App On Emulator.....
Thank You..!!

Comments
Post a Comment